Raymarching is a very powerful technique that can be used not only as a basis for rendering objects, but also to create various special effects, especially those involving volume rendering. I made this project to understand the basics of the raymarching technique. It is worth noting that in this project, no special attention was paid to performance or code adaptability; instead, it is a dissection of the raymarching process to better understand its inner workings.

Kernel of the raymarching process. This code is implemented using a Material Function in Unreal Engine.
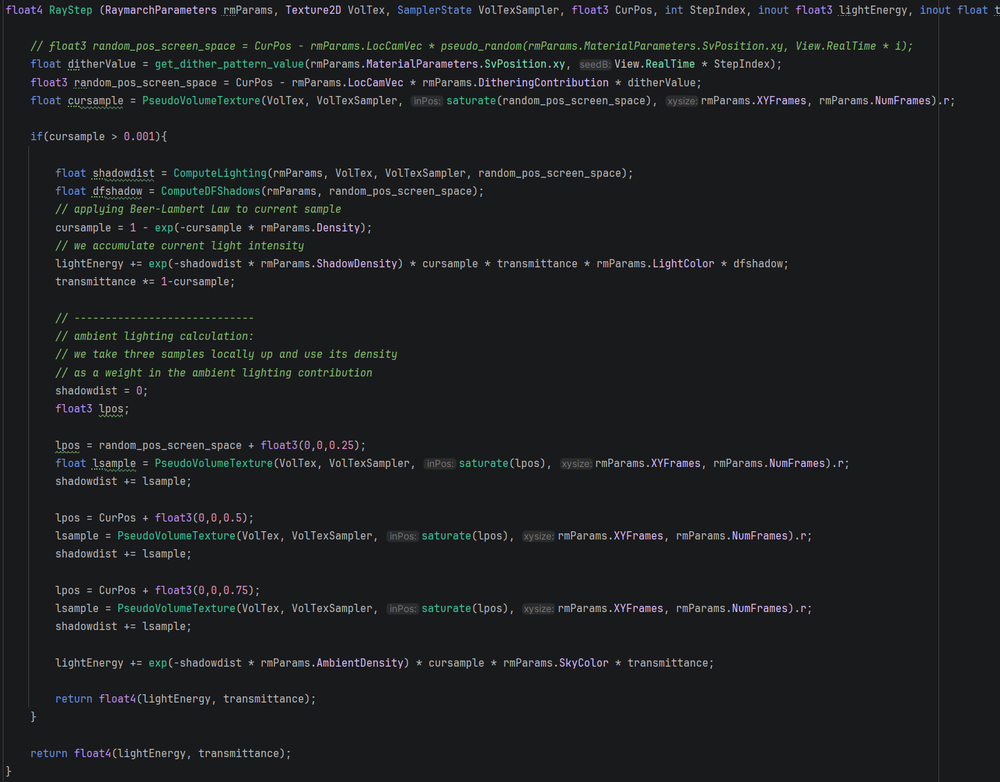
Main code executed in each Step of the ray marching.
Lighting
The algorithm calculates the lighting caused in the cloud by marching a ray from each evaluation point of the primary ray in the direction of the directional light rays. This ray evaluates the density at each step of its path, accumulating it in a variable that will be used to calculate the total amount of shadow at that point of the ray. The more density it finds in its path, the more occluded the evaluated point will be.
It is also calculated whether the ray is inside or outside the volume’s bounding box, to avoid unnecessary calculations. The calculation also stops if the accumulated value exceeds a certain threshold beyond which it is considered sufficiently shadowed, to allow for greater control over the system.
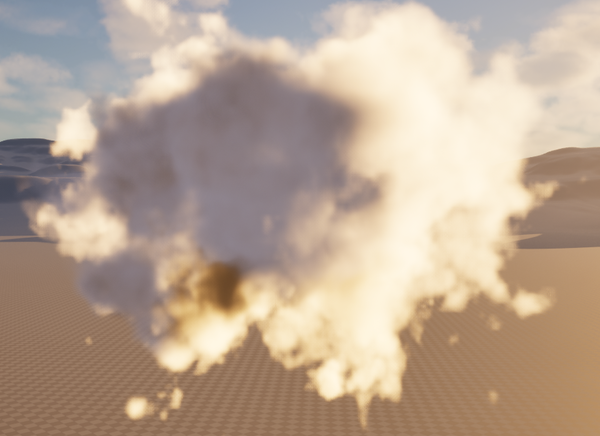
Cloud drawn using 3D Perlin Noise showing self-shadowing.
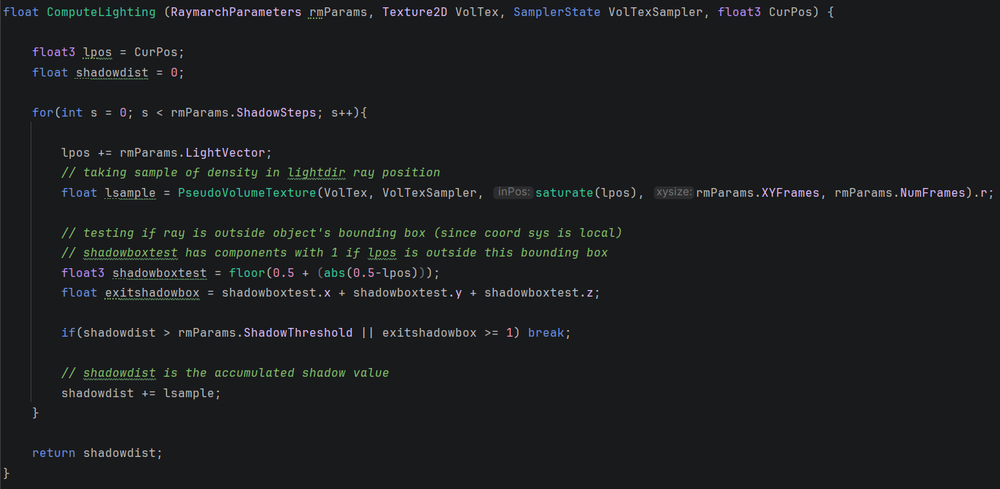
Main code for the lighting accumulation calculation.
Distance Field-based Shadowing
Until now we were talking about self-shadowing, but external occlusion is important to achieve believable volume rendering. To calculate the influence of other objects on the cloud’s lighting calculation—that is, the projection of shadows onto it—we turn to the DistanceFields that Unreal already provides. To calculate it, we employ a method similar to the lighting calculation, but in this case, instead of using a normal line, we employ a cone that widens as we move away from the original evaluation point, so that the distance of the object relative to the evaluation point increases the shadow diffusion (soft shadows).
It is worth noting that in order to evaluate the distance to the nearest point, we need to work with coordinates in WorldSpace. It is for this reason that we perform the conversion at the beginning of the function.
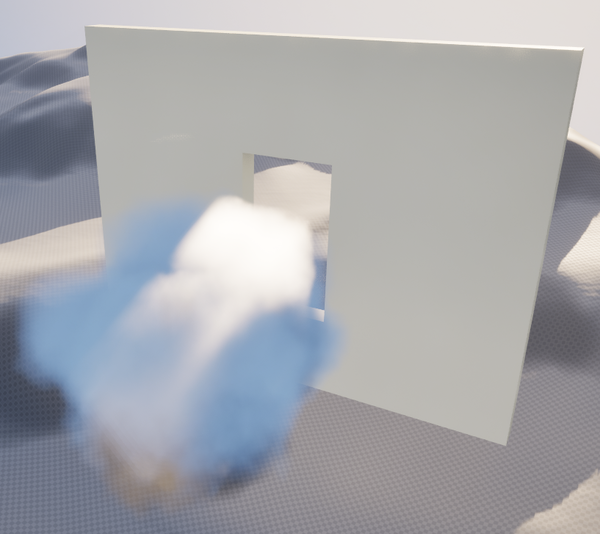
It can be observed how only the light entering through the window illuminates the cloud.
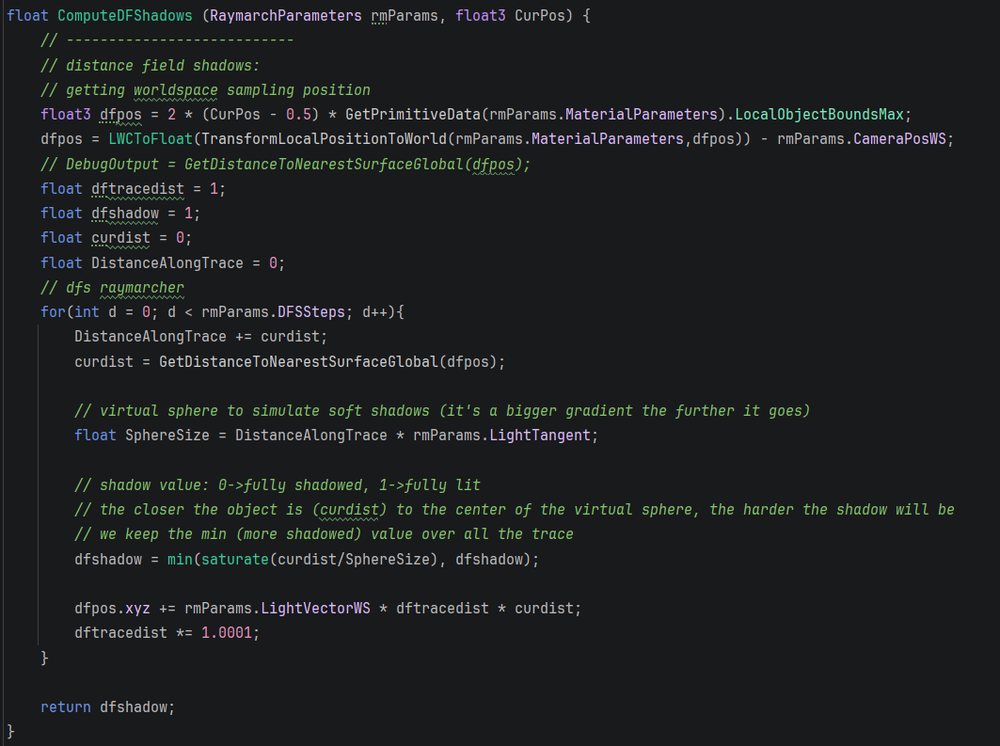
Main code for the lighting accumulation calculation.
Attempting to reduce banding
As with any approach to raymarching, by lowering the number of steps we take on each ray to calculate the visual representation of density, banding begins to appear due to the discrete nature of the process when trying to evaluate a continuous entity such as a volume.
To mitigate this effect, I use a spatial and temporal dithering technique that introduces a small displacement per pixel and per frame in the sampling position along the ray. This jitter breaks the spatial coherence of quantization errors, turning banding into high-frequency noise that the eye perceives as a smoother transition. This residual noise is further attenuated using temporal anti-aliasing or temporal super-resolution techniques, common in modern video game rendering pipelines.
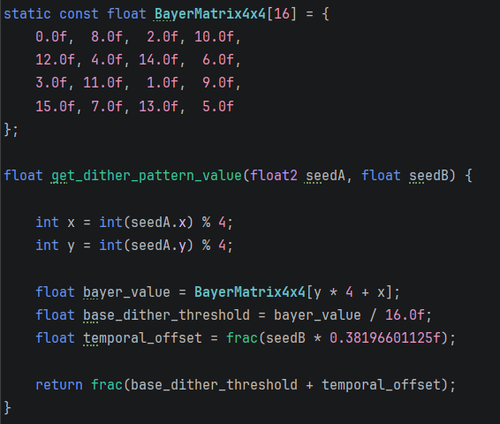
Code where a dithering value is obtained.
Non-uniform light absorption.
In the lighting calculation code in RayStep, where the light energy accumulated in lightEnergy is calculated, the variable rmParams.ShadowDensity is a 3-dimensional vector. By default, this vector has the same value in its three components, but the shader allows for different values to be applied, which affects how the object absorbs different light waves, an effect that can be observed in the following image. This provides much more control for the art team to configure how light is transmitted through the volume.
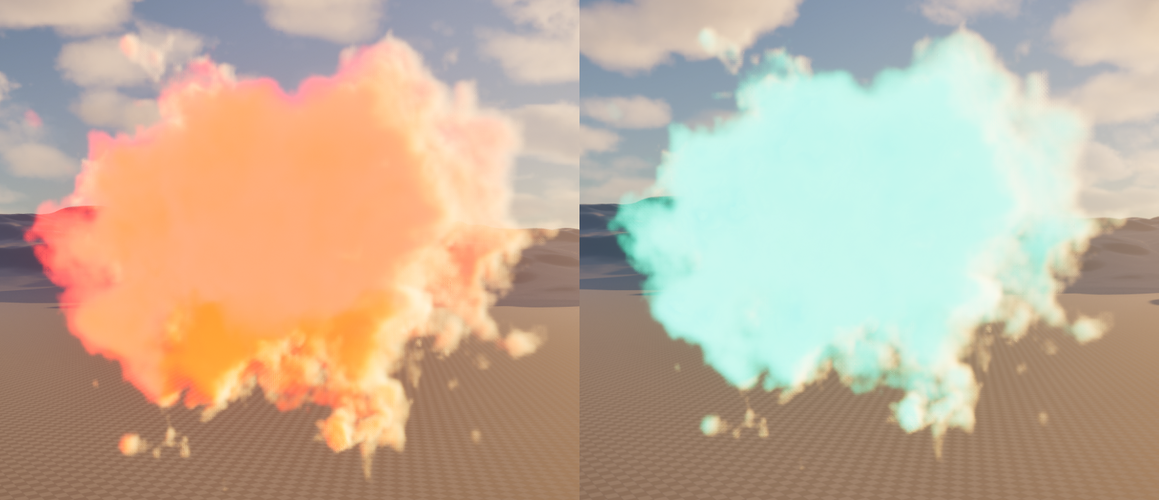
Left: absorption vector (0, 0.7, 1). Right: absorption vector (1, 0.1, 0).